本文概览:介绍了Swagger使用和持久化接口信息方法
1 介绍
Swagger是目前最流行的RESTful API文档管理框架,用于生成、调试和可视化API接口信息。可以很方便的与Spring boot整合,用于微服务的API管理。
2 应用
2.1 和spring boot整合
1、maven配置
|
1 2 3 4 5 6 7 8 9 10 11 12 13 |
<!-- swagger --> <dependency> <groupId>io.springfox</groupId> <artifactId>springfox-swagger2</artifactId> <version>2.7.0</version> </dependency> <dependency> <groupId>io.springfox</groupId> <artifactId>springfox-swagger-ui</artifactId> <version>2.7.0</version> </dependency> <!-- swagger --> |
2、新增配置类
|
1 2 3 4 5 6 7 8 9 10 11 12 13 14 15 16 17 18 19 20 21 22 23 24 25 26 27 28 29 30 31 |
@Configuration @EnableSwagger2 public class SwaggerConfig { /** * 1、扫描的包路径 * * @return */ @Bean public Docket createRestApi() { return new Docket(DocumentationType.SWAGGER_2) .apiInfo(apiInfo()) .select() .apis(RequestHandlerSelectors.basePackage("com.wuzhonghu.template.springboottemplate")) .paths(PathSelectors.any()) .build(); } private ApiInfo apiInfo() { return new ApiInfoBuilder() .title("服务:SpringBootMonitorTemplateSimple") .description("Spring Boot 使用Swagger2管理API") .termsOfServiceUrl("www.heartthinkdo.com") .contact("HeartThinkDo") // 联系人 .version("1.0") .build(); } } |
3、添加api说明
|
1 2 3 4 5 6 7 8 9 10 11 12 13 14 15 16 17 18 19 20 21 |
@Api(tags = "第一个控制器") @Controller public class HelloController { @ApiOperation(value = "测试json接口", extensions = @Extension(properties = @ExtensionProperty(name = "author", value = "test@xx.com"))) @RequestMapping(value = "/helloJson",method = RequestMethod.GET) @ResponseBody public ResponseDemo helloJson(){ ResponseDemo demo = new ResponseDemo(); demo.setMessage("success"); demo.setResultCode("000"); return demo; } @RequestMapping("/helloVm") public String helloVm(){ return "helloVm"; } } |
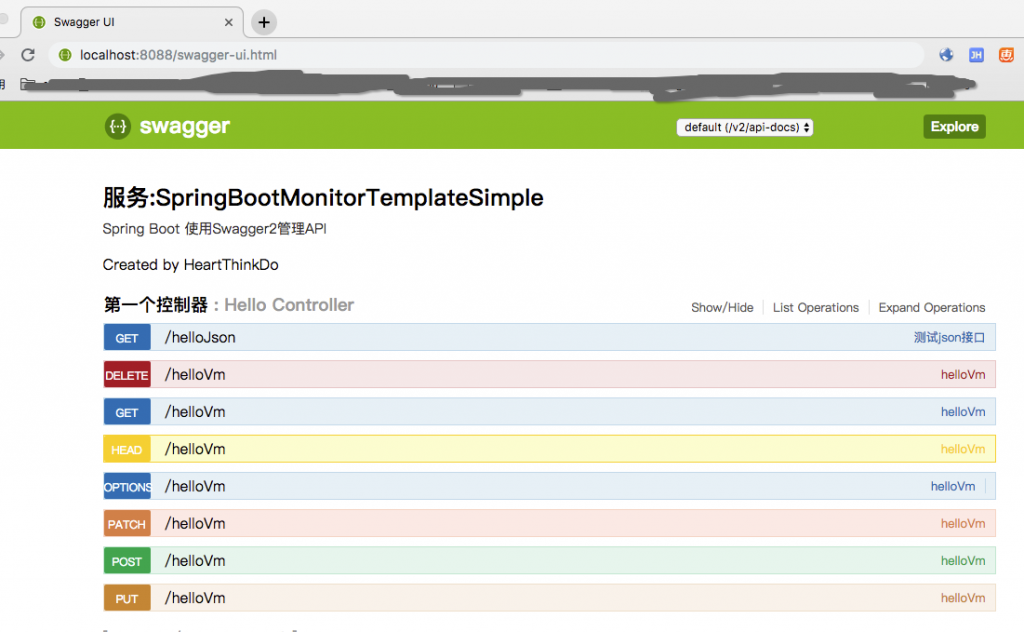
4、访问 http://localhost:8088/swagger-ui.html

5、存在问题
问题1 对于helloVm接口没有添加任何说名。默认信息就是接口的函数名字。

问题2: 在@RequestMapping中如果没有指定method为GET或者POST,此时会列出所有类型方法,如下

2.2 和eurka整合
部署Eureka,可以参考:
在配置文件中添加如下配置
|
1 |
eureka.instance.status-page-url=http://localhost:${server.port}/swagger-ui.html |
此时查看注册服务中心,如下超链接就是swagger-ui.html的地址。

2.3 相关注解
1、@Api 在Controller类上添加说明
2、@ ApiOperation在 接口上添加说明
3、@ApiImplicitParams和 @ApiImplicitParam 描述参数类型。使用这两个参数前提是需要使用@RequestParm来标识请求参数的名字。
|
1 2 3 4 5 6 7 8 9 10 11 12 |
@ApiOperation(value = "测试json接口", extensions = @Extension(properties = @ExtensionProperty(name = "author", value = "test@xx.com"))) @ApiImplicitParams({ @ApiImplicitParam(paramType = "query", name = "userId", value = "用户ID",required = true, dataType = "Integer"), @ApiImplicitParam(paramType = "query", name = "goodsId", value = "产品ID",required = true, dataType = "String") }) @RequestMapping(value = "/helloJson", method = RequestMethod.GET) @ResponseBody public ResponseDemo helloJson(@RequestParam("goodsId") String goodsId, @RequestParam("userId") Integer userId) { ..... } |
效果如下如下

3 抓取api
有时候我们需要在db中保存每一个api的信息,此时可以通过如下步骤获取:
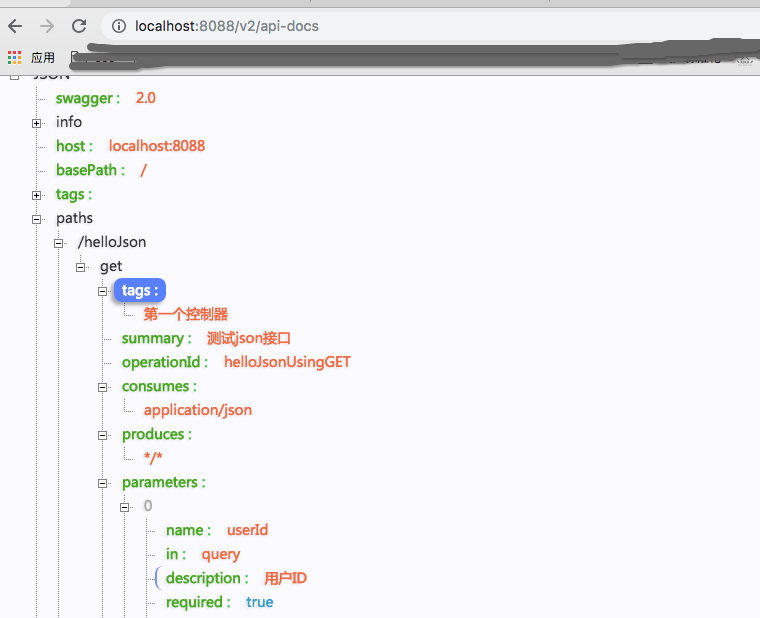
1、第一步 可以通过http://localhost:8088/v2/api-docs 获取json,,如下

2、第二步 使用jackson或者fastjson解析获取api的相关信息,并保存到db中。
附:常见问题
1、在访问接口时出现400错误
发现在接口中使用了@RequestParam注解,此时就必须传递参数了,因为该注解默认的情况下是参数必穿
|
1 2 3 4 5 |
public @interface RequestParam { .... boolean required() default true; .... } |


